
Are you looking for a cost-effective, reliable way to store dahlia tubers? Try plastic wrap! While most storage methods require peat moss, vermiculite, wood shavings or cedar chips, this foolproof method requires just good ol’ Saranwrap. Over the years, I’ve tried many storage methods for overwintering dahlias. Plastic wrap consistently results in little to no tuber loss. Here’s an easy step-by-step guide on how to store dahlia tubers in plastic wrap.
Digging Dahlia Tubers
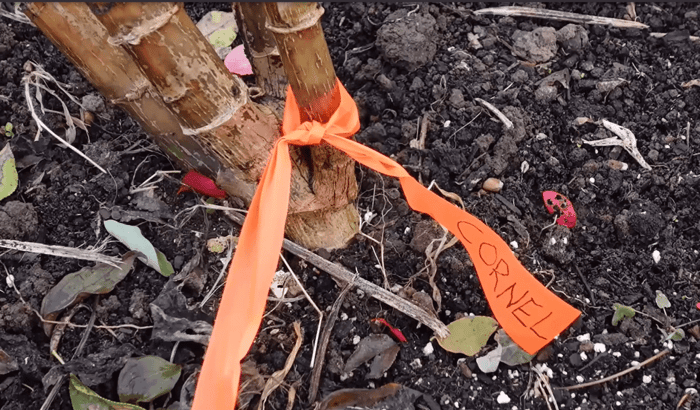
Before the first frost, label your dahlia plants with survey tape to keep track of the varieties prior to digging. Once the first frost occurs, the leaves and stems will quickly turn brown. Wait an additional week or two for the tubers to cure before digging them. While waiting isn't essential, it does help to toughen the skin of the tubers and many growers feel it increases survival rate during storage.
After the curing period, cut down the plants, leaving a 3-to-4-inch stem handle. Loosen the ground around the tubers by rocking a pitchfork back and forth around the perimeter of the clump. Then gently lift the tubers out of the ground using the stem handle you left behind. Thoroughly wash off the clumps, cut off the stem handle, and place them upside down in a frost-free location to drip dry for a day. Once the tuber clumps are dry, you can divide them into individual tubers.

Dividing Dahlia Tubers
A dahlia tuber must have a body, unbroken neck, and eye in order to grow and reproduce. The body holds the energy and nutrients needed to produce next year's plant, the eye turns into the sprout, and the unbroken neck connects these two parts. If any of these parts are missing the tuber will not grow.
Start by cutting the tuber clump in half to make it more manageable. Cut off any mushy or damaged tubers. Then begin separating the clump into individual tubers by slicing through the crown with sharp pruners. This can feel scary at first, but the process becomes easier with experience. Just remember that a viable must have all three parts and you'll be good to go.

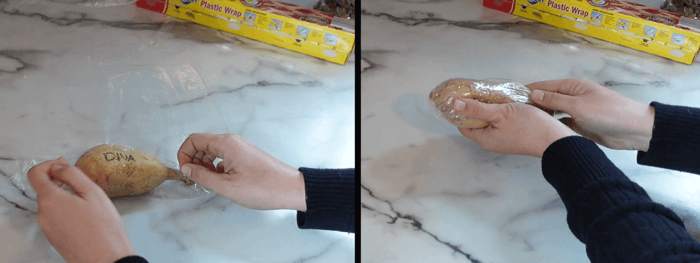
Wrapping Tubers in Plastic Wrap
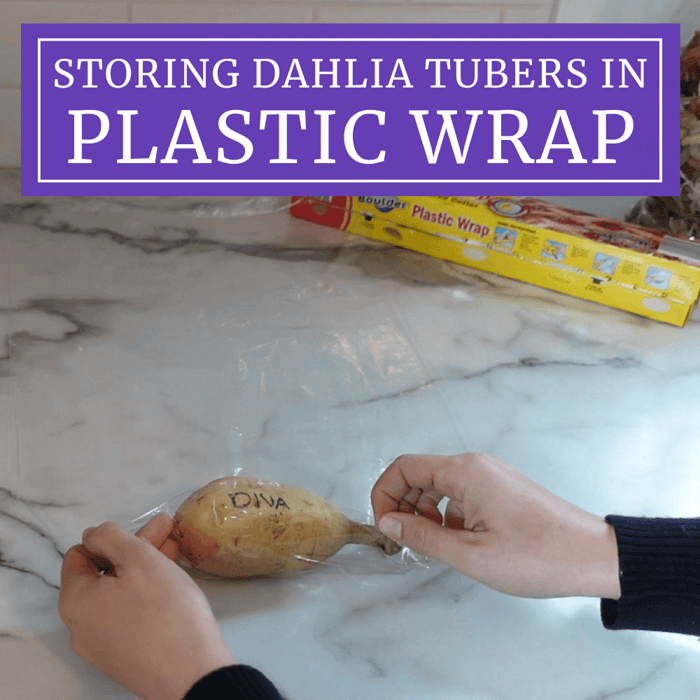
Once the clumps have been divided into individual tubers it’s time to wrap them. Tear off a 20-inch sheet of plastic wrap. Place a dahlia tuber at one end and roll the plastic wrap around it a few times. Once the first tuber is enclosed in plastic, you can add additional tubers of the same variety, one at a time, rolling as you go. Each tuber should be fully enclosed in plastic and separated from the next tuber by a layer of plastic. Once you have wrapped 5-7 tubers, fold in the sides of the plastic wrap as you would a burrito. Fasten the bundle with a piece of masking tape that's labeled with the cultivar's name.
If you want to bundle several varieties together, write the cultivar name directly on the tuber with a permanent garden marker.
Store the wrapped tubers in a corrugated box at 40-45 degrees F. You'll find there's essentially no loss from shriveling or drying when using this method. The plastic wrap holds in moisture and the plastic dividing the tubers prevents rot from infecting multiple tubers. This storage method also seems to encourage tubers to sprout a bit earlier than usual.

Shop our complete selection of dahlia tubers HERE.